
Tevo Tarantula Dual X Unboxing and Initial Setup
The Tevo Tarantula Dual X is a popular 3D printer known for its affordability and dual extrusion capabilities, allowing for printing with two different filaments or colors simultaneously. Setting up your Tevo Tarantula Dual X can seem daunting, but with a structured approach and some patience, you’ll be printing in no time. This comprehensive guide will walk you through the entire setup process, from unboxing to your first successful print. Follow along closely, and don’t hesitate to refer back to any section as needed. Remember to keep all the original packaging materials in case you need to return or store the printer.
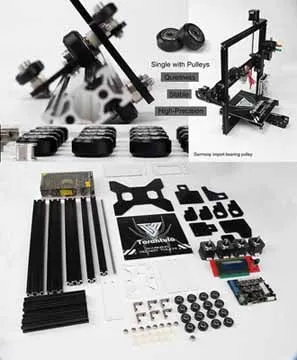
Parts Checklist
Before you start assembling your Tevo Tarantula Dual X, it is crucial to verify that all the necessary parts are present. Use the parts list provided in the user manual to ensure you have everything. This prevents potential delays and frustrations later in the assembly process. Typically, the kit includes various components, like the printer frame parts, screws, nuts, belts, pulleys, heated bed, control board, stepper motors, hotends, extruder components, filament holders, and power supply. Double-check everything against the manual to avoid any missing parts. If any parts are missing or damaged, contact the supplier immediately.
Tools Required

Having the right tools will significantly streamline the assembly process. Although the Tevo Tarantula Dual X kit may include some tools, you will likely need a few additional items. Essential tools include a set of Allen wrenches (metric), a Phillips head screwdriver, pliers, a ruler or measuring tape, a hobby knife or snips, and possibly a small level. A multimeter can also be helpful for troubleshooting electrical issues. Ensure you have a clean, well-lit workspace where you can spread out the components. Additionally, having a pair of wire cutters and strippers can be useful when preparing the wiring. Safety glasses are always recommended.
Assembly of the Tevo Tarantula Dual X Frame
The frame assembly is the foundation of your 3D printer. Take your time and ensure all the parts align correctly. This section describes the process of assembling the frame of the Tevo Tarantula Dual X. The printer’s frame provides structural integrity and houses the various components. Proper frame construction is essential for accurate printing. Begin by identifying all the frame components according to the manual, and then proceed methodically, making sure all screws are snug but not overtightened during the initial phases. Overtightening can strip threads or warp the frame. Aligning the frame is essential to prevent printing issues.
Base Assembly
The base of the Tevo Tarantula Dual X provides a stable platform for the printer. Start by assembling the base frame components. Attach the vertical supports to the base frame using the appropriate screws and ensure they are square. Tighten the screws, but not fully, to allow for minor adjustments. Check the squareness of the frame with a ruler. If necessary, adjust the screws to achieve a perfect square. Once the frame is aligned, securely tighten all screws.
Z-Axis Assembly
The Z-axis controls the vertical movement of the print head. Assemble the Z-axis components, including the threaded rods, stepper motors, and associated brackets. Carefully align the Z-axis rods with the frame and secure them. Ensure that the Z-axis rods move freely without binding. Properly assembled Z-axis is crucial for accurate layer height and print quality.
X-Axis and Y-Axis Assembly
The X and Y axes control the horizontal movements of the print head and the print bed, respectively. Attach the X-axis assembly to the Z-axis supports. Install the Y-axis components on the printer base. Ensure that the belts are properly tensioned and that the axes move smoothly. Properly tensioned belts and smooth movements are essential for the printer’s performance. Make sure the belts are not too loose, which can lead to inaccurate prints, and not too tight, which can stress the motors and bearings.
Hotend and Extruder Assembly
The hotend melts the filament, and the extruder feeds it. Assemble the hotend components, including the heat block, nozzle, and heater cartridge. Secure the hotend assembly to the X-axis carriage. Assemble the extruder components, which include the motor, hobbed gear, and filament feed mechanism. Ensure the extruder is properly aligned with the hotend. It is important to assemble these components carefully to prevent filament jams and ensure consistent extrusion. The assembly includes the nozzle, which should be tightened when hot to prevent leaks.
Wiring the Tevo Tarantula Dual X

Proper wiring is crucial for the printer to function correctly and safely. Carefully connect all the electrical components to the control board, following the wiring diagrams provided in the manual. Double-check each connection to ensure it is secure. Take special care with the power supply connections and ensure that the voltage selector switch is set correctly for your region (110V or 220V). Incorrect wiring can cause damage to the printer or pose a fire hazard.
Connecting the Electronics
Connect the stepper motors, endstops, heated bed, hotends, and fans to the appropriate terminals on the control board. Ensure that all wires are securely connected and that the polarity is correct. Use the provided wiring diagram to verify all connections. Route the wires neatly and secure them with cable ties to prevent them from interfering with the moving parts of the printer. Check that the thermistors are connected to the correct ports to monitor the temperature of the hotend and the heated bed. A clean and organized wiring setup can significantly reduce troubleshooting time.
Firmware Installation and Configuration
Firmware controls the printer’s operations. You may need to flash the firmware onto the control board. This section covers the firmware installation and configuration process. Your printer’s performance depends on the proper installation of the firmware. This involves uploading the firmware to the printer’s control board, a crucial step for the printer’s operation. After the firmware is installed, you’ll configure the settings. Configure the firmware settings according to your printer’s specifications.
Flashing the Firmware

Download the appropriate firmware for your Tevo Tarantula Dual X. You can often find pre-compiled firmware or source code on the manufacturer’s website or on community forums like GitHub. Connect your printer to your computer via USB and use a firmware flashing tool like Arduino IDE or Pronterface to upload the firmware to the control board. Follow the instructions provided with the firmware and the flashing tool. Ensure that the correct board and communication port are selected. After the upload is complete, disconnect the printer from the computer and restart the printer. Verify the firmware installation by checking the printer’s LCD screen. Note that updating firmware can be dangerous, so ensure that you have a backup of your existing firmware.
Configuring Firmware Settings
Once the firmware is flashed, you need to configure various settings to match your printer’s specifications. This includes setting the steps per millimeter for the X, Y, and Z axes, as well as the extruder. These settings are typically set through the LCD menu on the printer or via a computer connected to the printer. You may need to adjust settings like the bed temperature, nozzle temperature, and fan speed. Calibrate the PID settings for the hotend and the heated bed to maintain stable temperatures. These settings can often be found in the printer’s documentation or by consulting online communities.
Leveling the Bed on Your Tevo Tarantula Dual X
Proper bed leveling is essential for successful prints. The Tevo Tarantula Dual X uses a heated bed. A properly leveled bed ensures the first layer adheres correctly, preventing warping and other issues. Leveling can be done manually or automatically, depending on the configuration of your printer. The bed should be level across its entire surface. Even a small discrepancy can cause major problems with the prints. Follow these guidelines to level the bed effectively and consistently. Regular bed leveling is necessary to achieve the best print quality.
Manual Bed Leveling

Manual bed leveling involves adjusting the bed height at each corner using the leveling screws. Home the printer (move the print head to the home position) and use a piece of paper or a feeler gauge to measure the distance between the nozzle and the bed. Adjust the leveling screws until the nozzle lightly touches the bed. Repeat this process for all four corners. Make sure the nozzle doesn’t drag on the bed and that the paper can slide with a slight resistance. For dual extrusion printers, level the bed with each nozzle separately. After leveling, save the settings in your printer’s menu or firmware.
Using Auto Bed Leveling
If your Tevo Tarantula Dual X has auto bed leveling (ABL), the process is automated. The ABL sensor, which can be a probe or an inductive sensor, measures the distance between the nozzle and the bed at multiple points. After homing the printer, the sensor will measure several points across the bed. The printer then uses these measurements to compensate for any bed imperfections. The printer then uses this information to adjust the Z-axis during printing. Run the auto-leveling routine and then save the mesh or settings. Verify that the ABL is working correctly by printing a test model.
First Print and Calibration
Once everything is assembled, configured, and leveled, it’s time to perform your first print. This section will explain how to prepare for your first print. Load filament and preheat the hotend and bed. Start by printing a test model and then observe it. It is also a good time to calibrate various settings to get the best print possible. During this stage, you may need to adjust settings for optimal print quality. The test print serves as a valuable benchmark for assessing the quality of your setup, allowing for adjustments and optimizations.
Loading Filament and Preparing to Print
Load the filament into the extruder. Preheat the hotend to the appropriate temperature for your filament type. Once the hotend reaches the correct temperature, feed the filament through the extruder and nozzle. Make sure the filament extrudes smoothly without any obstructions. Select your test print from an SD card or send it via USB. Preheat the bed and hotend to the temperatures recommended for the selected filament. Ensure that the filament is flowing properly and that the bed is at the right temperature before starting the print. Select a test print file and start the print. Watch the first layer carefully to make sure it adheres to the bed.
Calibration Procedures for Optimal Prints
Calibration is essential to achieve high-quality prints. Calibrate the extruder steps per millimeter by measuring how much filament the extruder pushes through and then adjusting the setting accordingly. Fine-tune the bed level and the nozzle height. Adjust the first layer height and flow rate for optimal bed adhesion. Experiment with different print speeds and temperatures to find the optimal settings for your filament and printer. Check the belts for tightness. Regularly calibrate your printer to ensure consistent and high-quality prints. There are numerous online resources that can assist you with these calibration steps.
Troubleshooting Common Issues
Even after careful setup, you may encounter issues. This section provides troubleshooting tips for common problems like nozzle clogging, bed adhesion problems, and layer shifting. Every 3D printer will experience issues from time to time. Knowing how to troubleshoot these problems is essential. This will help you quickly identify and resolve them. Learning to identify and address these issues will increase your chances of printing success and make you a more proficient 3D printer user.
Nozzle Clogging
Nozzle clogs are a common problem. Signs of a clog include inconsistent extrusion or no extrusion at all. If you experience clogging, try increasing the nozzle temperature. You can also use a thin needle or a specialized tool to clear the clog. To prevent clogs, ensure the filament is clean and dry. Make sure the nozzle temperature is appropriate for the filament. Consider installing a filament filter to remove any dust or debris that might cause clogs.
Bed Adhesion Problems
Poor bed adhesion can cause prints to warp or detach from the bed. This can be frustrating for anyone. Ensure the bed is clean and level. Use a bed adhesive like glue stick, hairspray, or painter’s tape to improve adhesion. Adjust the bed temperature. Ensure the first layer is properly calibrated and that the nozzle is at the correct height. Consider using a brim or a raft to increase the contact area with the bed. A properly prepared bed is essential for successful first-layer adhesion.
Layer Shifting
Layer shifting occurs when the layers of a print are not aligned. This can happen due to loose belts, skipping stepper motors, or mechanical issues. Check the belt tension and tighten them if necessary. Make sure the stepper motor drivers are properly configured and that the motors are not overheating. Ensure that the printer frame is rigid and that there is no play in the moving parts. Ensure the printer is on a stable surface and that it is not vibrating during printing. If problems persist, inspect your printer for mechanical issues that may cause layer shifting.