Why Upgrade Tevo Tarantula Dual Z?
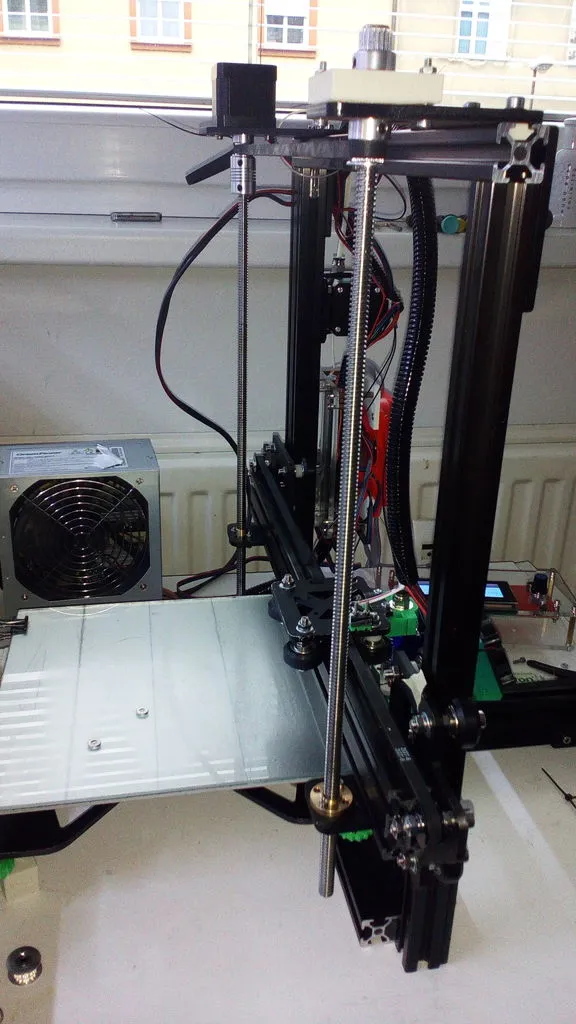
The Tevo Tarantula is a popular and affordable 3D printer, loved by hobbyists and enthusiasts alike. However, like many entry-level 3D printers, it has areas where improvements can significantly enhance its performance. One of the most impactful upgrades is the dual Z-axis upgrade. This modification addresses a common issue with single Z-axis designs instability. A dual Z-axis system utilizes two lead screws and motors to control the vertical movement of the Z-axis, offering a more stable and precise printing experience. This upgrade offers a pathway to improved print quality, reliability, and ease of use, making it a worthwhile investment for anyone seeking to get the most out of their Tevo Tarantula.
Enhanced Stability of Dual Z Axis
The primary advantage of a dual Z-axis upgrade is the enhanced stability it provides. The original Tevo Tarantula design, with its single Z-axis lead screw, can be prone to instability, especially with taller prints. The weight of the print head assembly can cause the Z-axis to sag or tilt, leading to inconsistent layer heights and print defects. By implementing a dual Z-axis system, the weight is distributed more evenly across two points of support. This prevents the print bed and print head from tilting or wobbling, ensuring a more level and stable printing platform. The result is a more consistent and reliable printing process, particularly for large or complex models. The dual Z system ensures both sides of the Z-axis move synchronously and evenly, leading to superior prints.
Reducing Wobble and Improving Print Quality
A direct consequence of the enhanced stability is the reduction of wobble, which is a common source of print defects. Wobble manifests as inconsistent layer lines, ringing, or ghosting in the printed object. The dual Z-axis system eliminates or significantly reduces wobble by providing a more rigid and stable platform for the print head to move. The dual Z axis system also helps improving print quality because the system stabilizes the print bed and print head assembly. This allows for more precise control over the Z-axis movement during printing. This improvement leads to cleaner lines, sharper details, and smoother surfaces on the final product. The ability to produce higher-quality prints is a major benefit for anyone interested in creating professional-looking 3D models.
Increased Printing Accuracy
The dual Z-axis upgrade directly impacts the accuracy of your 3D prints. With a more stable and level print bed, the printer can accurately position each layer of the model. This is crucial for achieving precise dimensions and features, especially for parts that require tight tolerances or intricate details. Without a dual Z-axis setup, the single lead screw can cause the Z-axis to bind or stick, leading to inaccuracies. The dual system helps prevent this by ensuring smooth and consistent vertical movement. This is particularly beneficial for printing functional parts, where precision is critical. The upgrade ultimately results in printed objects that more closely match the original design, which is essential for prototyping and manufacturing.
Precise Layer Alignment for Superior Prints
Precise layer alignment is another critical factor in achieving high-quality 3D prints. The dual Z-axis upgrade ensures that each layer is deposited evenly and accurately on top of the previous one. This is in stark contrast to a single Z-axis system, where the print bed may tilt slightly during printing, causing layers to misalign. Misalignment leads to visible defects such as shifting or bulging in the final print. The dual Z system eliminates these issues, the enhanced stability of the dual Z-axis system promotes precise layer alignment, resulting in a smoother, more refined surface finish and improved overall print quality. This is especially noticeable on models with complex geometries or fine details, where accurate layer alignment is essential for the final look.
Improved Overall Printing Performance
Beyond the specific benefits mentioned above, the dual Z-axis upgrade contributes to the overall performance of your Tevo Tarantula. The enhanced stability and accuracy translate to faster print speeds and reduced printing failures. Since the printer operates more smoothly and reliably, you can confidently print more complex models without worrying about potential issues. Moreover, the upgrade can extend the lifespan of your printer by reducing wear and tear on the Z-axis components. A more efficient and reliable printer allows for more efficient use of time and resources, and it will enable you to produce high-quality prints more consistently. The upgrade offers a significant improvement to your 3D printing experience.
Simplified Calibration Process
Calibrating a 3D printer can be a frustrating process, but the dual Z-axis upgrade can make it easier. With a stable and level Z-axis, the calibration process becomes less complicated. You will spend less time correcting bed leveling issues and more time printing. The dual system eliminates the need to constantly adjust the bed level, which is a common problem with the single Z-axis. The reduced need for frequent adjustments saves time and frustration, and will allow you to achieve consistent, high-quality prints without excessive effort. By stabilizing the bed, the dual Z-axis simplifies the calibration process.
Easy Steps to Upgrade
Upgrading your Tevo Tarantula with a dual Z-axis system is a relatively straightforward process that can be accomplished with basic tools and some patience. The upgrade typically involves installing additional lead screws, motors, and associated hardware to create a dual Z-axis setup. The process involves careful disassembly, component installation, firmware configuration, and calibration. Follow the instructions of your chosen kit to ensure a successful upgrade. The process is accessible to most hobbyists, making it an excellent project for improving your 3D printer.
What You Need for the Dual Z Upgrade
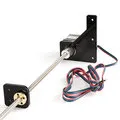
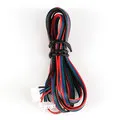
The components needed for a dual Z-axis upgrade typically include two lead screws, two stepper motors, brackets, and various screws and connectors. You will also need tools such as Allen wrenches, screwdrivers, and possibly a soldering iron. Many upgrade kits are available, including all necessary hardware and detailed instructions. Consider researching and choosing a kit that is compatible with your specific Tevo Tarantula model. Make sure you have the tools, and the correct kit for this task.
Detailed Installation Guide
Start by carefully disassembling the existing Z-axis components, including the motor, lead screw, and any associated brackets. Install the new lead screws and motors, ensuring that they are aligned correctly. Use the provided brackets and screws to securely attach the motors and lead screws to the printer frame. Depending on your specific kit, you may need to modify the firmware to enable the dual Z-axis functionality. Once all the hardware is installed, connect the motors to your printer’s control board. After completing the hardware installation, you will need to calibrate the Z-axis. This will involve leveling the print bed and adjusting the Z-offset to ensure proper nozzle height. Following the detailed instructions in your chosen kit is very important.
Selecting the Right Dual Z Upgrade Kit
Choosing the right dual Z-axis upgrade kit is essential for a successful upgrade. Research different kits and compare their features, components, and reviews. Consider factors such as ease of installation, compatibility with your Tevo Tarantula model, and overall build quality. Look for kits that include all the necessary hardware and detailed instructions. Check the customer reviews and ratings to ensure you’re selecting a reliable and well-regarded product. Choosing the right kit ensures you will get the benefits of the upgrade and avoid potential issues.
Choosing the Components
When selecting the components for your dual Z-axis upgrade, pay attention to the quality of the lead screws and stepper motors. High-quality lead screws will ensure smooth and accurate vertical movement, while reliable stepper motors will provide the necessary power and control. Consider the type of lead screws (e.g., T8) and the motor specifications (e.g., step angle and holding torque) to ensure compatibility and optimal performance. Choosing high-quality components will enhance the reliability and performance of your 3D printer.
Upgrading Your Tevo Tarantula Step by Step
The dual Z-axis upgrade process can be broken down into several key steps. First, prepare your printer by turning it off and disconnecting the power. Then, carefully disassemble the existing Z-axis components, including the motor, lead screw, and any brackets. Install the new lead screws and motors, ensuring they are properly aligned. Next, mount the new motors and lead screws. Reconnect the components. Then, configure the firmware by updating the settings for the dual Z-axis. Finally, test the printer by performing a print test and fine-tune the Z-axis. Performing these steps carefully and correctly will provide you with the benefits of the upgrade.
Prepare the Printer for Upgrade
Before beginning the upgrade, it’s essential to prepare your Tevo Tarantula safely. Turn off the printer and disconnect the power supply. Gather all the necessary tools and components, including the upgrade kit, Allen wrenches, screwdrivers, and any other tools that your kit requires. Place your printer on a stable and well-lit surface, making sure you have plenty of space to work. Remove any existing prints or materials from the print bed. Review the upgrade kit’s instructions thoroughly. Prepare your printer and workspace before starting.
Installing the Dual Z Axis Kit

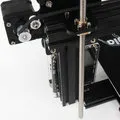
Carefully follow the instructions included with your dual Z-axis upgrade kit. Disassemble the original Z-axis components, including the motor, lead screw, and brackets. Install the new lead screws and motors, making sure to align them properly with the frame. Attach the provided brackets to secure the motors and lead screws. Ensure all screws are tightened to ensure rigidity and stability. When installing the new lead screws, double-check that they are parallel and that the motors are properly aligned. This will prevent binding and ensure smooth Z-axis movement.
Configuring Firmware
After the hardware installation, you’ll need to configure your printer’s firmware to accommodate the dual Z-axis setup. Connect your printer to your computer and use the appropriate software to modify the firmware settings. You may need to update the number of Z-axis motors, adjust the steps per millimeter, and calibrate the Z-offset. The specific steps will vary depending on your firmware and printer model. Refer to the documentation of your firmware and the upgrade kit for detailed instructions on how to make these changes. If you’re unfamiliar with firmware configuration, seek assistance from online forums or experienced users.
Testing and Fine-Tuning
After completing the hardware installation and firmware configuration, it’s time to test and fine-tune your printer. Perform a test print of a small, simple model to ensure that the Z-axis is moving smoothly and accurately. Check the first layer adhesion, layer height, and overall print quality. If you encounter any issues, such as layer shifting or Z-axis binding, troubleshoot the problem by checking your hardware and firmware settings. Make minor adjustments to the Z-offset and bed leveling to optimize print quality. Take the time to test and fine-tune your settings to produce high-quality prints.
Troubleshooting Common Issues

Even with careful installation and calibration, you may encounter some issues with your dual Z-axis upgrade. Common problems include Z-axis binding, layer shifting, and inconsistent layer heights. If the Z-axis is binding, check the alignment of the lead screws and motors. If the layer shifting occurs, check the belt tension and motor connections. Inconsistent layer heights can be caused by an uneven print bed. Refer to the manufacturer’s instructions and the information available online for troubleshooting. If you are having issues with the upgrade, do not be afraid to get help from online forums or other people who have done this before.
Avoiding Printing Problems
To avoid printing problems, start with the basics of 3D printing. Ensure that your print bed is level, the nozzle height is set correctly, and the print bed is clean. Use good-quality filament and store it properly to prevent moisture absorption. Check the printer’s settings in your slicer and the physical printer. Ensure you are using the appropriate settings for the filament type and the model’s complexity. By avoiding these common issues, you’ll improve your chances of producing high-quality prints and avoid any problems related to your dual Z-axis upgrade.
Maintenance and Calibration
Regular maintenance and calibration are essential for ensuring optimal print quality and performance. After installing the dual Z-axis upgrade, regularly inspect the lead screws, motors, and brackets for any signs of wear or damage. Clean the lead screws and lubricate them. Check the belt tension and tighten as needed. Calibrate your printer regularly, leveling the print bed and adjusting the Z-offset. The level bed is important. The benefits of proper maintenance and calibration are higher-quality prints.
Regular Maintenance for Optimal Results
To maintain the benefits of your dual Z-axis upgrade, implement a routine maintenance schedule. Clean the lead screws and lubricate them to ensure smooth movement. Inspect the motors and connections for any signs of wear or damage. Keep the printer clean and free of debris. Regularly check and tighten any loose screws or bolts. By adhering to a maintenance schedule, you can prolong the life of your 3D printer and sustain its performance. This will lead to higher-quality prints and a better overall user experience.
Calibrating for Best Prints
Proper calibration is crucial for obtaining the best results from your 3D printer. Level the print bed accurately, and adjust the Z-offset to ensure that the nozzle is at the correct height above the print bed. The Z-offset is the critical distance between the nozzle and bed. Perform test prints and fine-tune the settings until you achieve the desired level of print quality. Experiment with different settings to learn what works best for your printer and your filaments. Taking the time to calibrate your 3D printer will result in more accurate prints.
The Benefits of Upgrading
The benefits of upgrading your Tevo Tarantula with a dual Z-axis system are substantial. You can expect improved stability, reduced wobble, and higher print quality. Increased printing accuracy and more precise layer alignment will enhance the overall printing experience. In addition to improving the quality of your prints, you’ll see better printing performance, and the upgraded printer can produce more consistent results. With the upgrade, your printer can produce intricate and detailed models with greater accuracy. All these factors make the upgrade a worthwhile investment for the serious hobbyist.
Cost Effectiveness and Time Savings
The dual Z-axis upgrade offers excellent value for your investment. The components for the upgrade are relatively inexpensive, making it an affordable way to significantly improve the performance of your Tevo Tarantula. You’ll also save time and reduce printing failures because your prints will be more reliable. By investing in this upgrade, you can achieve better results. You will also have a more efficient and reliable 3D printing experience.
Conclusion the Difference Dual Z Makes
The dual Z-axis upgrade is one of the most impactful modifications you can make to a Tevo Tarantula 3D printer. The enhanced stability, reduced wobble, and increased accuracy will provide a superior printing experience. With improved print quality and more consistent results, you’ll be able to create more complex and detailed models with confidence. The relatively low cost of the upgrade makes it an accessible option for hobbyists and enthusiasts looking to get the most out of their 3D printers. This upgrade is one of the best upgrades for the Tevo Tarantula 3D printer.