Why Upgrade to a Tevo Tarantula Glass Bed?
Upgrading your Tevo Tarantula with a glass bed is a fantastic improvement that can significantly enhance your 3D printing experience. The stock bed on the Tevo Tarantula, while functional, often presents challenges in terms of print quality and adhesion. A glass bed offers a smooth, flat surface that promotes better first-layer adhesion, which is crucial for successful prints. This upgrade can dramatically reduce warping and curling, common issues with the original bed. Moreover, the glass bed provides a more aesthetically pleasing finish to the bottom of your prints. This upgrade is a cost-effective way to boost the overall performance and quality of your 3D prints, making it a worthwhile investment for any Tevo Tarantula owner who is serious about improving their results. Considering the relative simplicity of the installation process, the benefits of a glass bed upgrade are substantial.
Improved Print Quality
The introduction of a glass bed directly translates into improved print quality. The flat, uniform surface of the glass bed provides a stable base for your prints, minimizing the risk of warping and inconsistencies. This is particularly noticeable on the first layer, where evenness is paramount for the success of the entire print. With a glass bed, you’ll find that your prints have a smoother, more refined finish. This upgrade minimizes imperfections, leading to more precise dimensions and cleaner aesthetics. The glass helps to distribute heat evenly across the printing surface, preventing thermal stresses that can cause warping. This ensures that the first layer adheres properly and all subsequent layers build on a stable foundation. The result is a higher overall quality, making this a worthwhile investment for achieving professional-looking results on your Tevo Tarantula.
Enhanced Bed Adhesion

Enhanced bed adhesion is a key benefit of the Tevo Tarantula glass bed upgrade. A glass bed provides a superior surface for your prints to adhere to, reducing the likelihood of prints detaching mid-process. This is typically achieved by applying an adhesive, such as hairspray, glue stick, or specialized 3D printing bed adhesives, which create a strong bond between the print and the bed. This increased adhesion is especially beneficial for prints with large surface areas or intricate designs, where warping and lifting are common. Using a glass bed, combined with the right adhesive, will significantly improve the reliability of your prints. Proper adhesion ensures that your prints stay in place throughout the entire printing process, reducing frustration and wasted filament. This translates to fewer failed prints and more successful projects, making it a fundamental upgrade for any Tevo Tarantula user.
Leveling Your Tevo Tarantula Glass Bed
Accurate bed leveling is essential for achieving high-quality 3D prints, and it’s especially crucial when using a glass bed on your Tevo Tarantula. Due to the flatness of a glass surface, even slight inconsistencies can affect first-layer adhesion and overall print quality. Properly leveling the bed involves adjusting the screws at each corner of the bed until the nozzle is the correct distance from the glass. You can use a piece of paper to gauge the distance between the nozzle and the bed. It should provide slight resistance when you move it back and forth. Regularly checking and adjusting the bed level is part of the maintenance, ensuring consistent results. You might want to level the bed before each print to ensure optimal adhesion and print quality. Precise leveling reduces the risk of nozzle crashes and ensures your prints stick to the bed effectively, leading to successful printing.
Preparing the Tevo Tarantula
Before installing the glass bed, you must prepare your Tevo Tarantula. First, turn off and unplug the printer to ensure safety. Allow the heated bed to cool down completely. Remove the existing print bed surface, which may be a piece of BuildTak or similar. Ensure that the heated bed is clean, removing any remnants of previous prints or adhesive materials. Inspect the bed’s surface for any damage. If the existing bed has any irregularities, it’s crucial to address them before installing the glass bed to ensure a level printing surface. This may involve tightening screws or replacing worn-out components. This preparation phase is the first step towards a successful glass bed installation. A clean and well-maintained heated bed will ensure that the glass bed sits properly and the printer functions as intended.
Cleaning the Glass Bed

Regular cleaning of the glass bed is essential for maintaining optimal print quality and adhesion. The glass bed can be cleaned with isopropyl alcohol (IPA) to remove any residues from previous prints, oils from your fingers, or other contaminants. Apply the IPA to a clean cloth or paper towel and gently wipe down the surface of the bed. Avoid using excessive amounts of liquid, as this could damage the printer’s components. After cleaning, allow the glass bed to dry completely before use. You can use a lint-free cloth to remove any streaks and ensure a pristine printing surface. A clean bed ensures proper adhesion and prevents warping. Regularly cleaning the glass bed will extend its lifespan and ensure that your prints come out looking their best. Always make sure the bed is cool before attempting to clean it.
Installing the Glass Bed
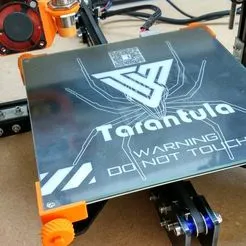
Installing the glass bed on your Tevo Tarantula is a straightforward process. Once the heated bed is prepared and cleaned, place the glass bed directly on top of it. Ensure that the glass bed is centered and aligned correctly with the heated bed. The glass bed should sit flush with the heated bed surface. If your glass bed is slightly larger than the heated bed, ensure that it is positioned to maximize the printable area. Many users choose to use clips or adhesive to secure the glass bed to the heated bed, preventing it from shifting during printing. Take care to avoid any obstruction of the nozzle. Ensure that you don’t damage the glass bed during installation. Properly positioning the glass bed is crucial for ensuring proper adhesion, and achieving the desired print quality. Take your time and double-check the alignment before proceeding.
Securing the Glass Bed with Clips
Securing the glass bed with clips is an important step to prevent it from moving during the printing process. You can use binder clips, specifically designed bed clips, or other suitable clips to secure the glass bed to the heated bed. Place the clips around the edges of the glass bed, ensuring they hold it firmly in place without interfering with the print head’s movement. It is important to evenly distribute the clips. You can use four clips, one on each side, or more, depending on the size of the glass bed and the level of security you desire. Ensure the clips are positioned so they do not obstruct the nozzle or the print head. Test the printer to ensure that the print head can move freely over the entire bed without hitting the clips. This step is essential for preventing print failures caused by bed movement. The right clips provide the necessary support to hold the bed firmly in place, and contributes to successful prints.
Leveling the Bed after Installation

After installing the glass bed and securing it with clips, you must re-level the bed. Due to the added thickness of the glass bed, the nozzle height will need to be adjusted. You can use the leveling screws on the Tevo Tarantula to adjust the bed’s height. The objective is to achieve the correct nozzle-to-bed distance, often referred to as the Z-offset. You can use the paper method, sliding a piece of paper between the nozzle and the bed. Adjust the leveling screws until the paper provides slight resistance when you move it back and forth. You can also use the printer’s auto-leveling function, if equipped, to calibrate the bed height automatically. After leveling, run a test print, like a single-layer square, to verify that the first layer adheres properly. If needed, fine-tune the bed leveling. Accurate bed leveling is the most critical step in ensuring successful and high-quality 3D prints.
Optimizing Print Settings for Glass Bed
Optimizing your print settings is essential to maximize the benefits of the glass bed. Adjust your print temperature based on the filament you are using. PLA typically prints well with a bed temperature between 50-60°C. ABS, on the other hand, often requires a bed temperature of 100-110°C for optimal adhesion. Adjust your initial layer height to ensure good adhesion. A slightly larger initial layer height can help the first layer stick to the glass bed. Set the initial layer speed slower than the normal print speed. Reduce the risk of the print detaching from the bed during the initial layers. Consider using a brim or raft for prints with a small footprint, as these can increase the surface area and improve adhesion. These settings will contribute to successful prints on your glass bed. Experimenting with settings will help you find the perfect combination.
Adjusting Z-Offset
Adjusting the Z-offset is a critical step to ensure the nozzle is at the correct height relative to the glass bed. The Z-offset is the distance between the nozzle and the bed. When using a glass bed, the Z-offset will need to be adjusted to account for the added thickness of the glass. Many 3D printers have a Z-offset adjustment setting in their firmware. You can usually adjust this setting through the printer’s control panel or through the slicer software. The goal is to ensure that the nozzle is at the perfect distance from the bed, neither too close nor too far. If the nozzle is too close, it can scrape the bed or clog. If it is too far, the filament won’t adhere properly. You may need to adjust the Z-offset, either manually or through the auto-leveling procedure. Fine-tuning the Z-offset ensures that the first layer is properly laid down and that your prints adhere successfully to the glass bed. You can also adjust Z-offset by using paper method.
Choosing the Right Filament for Glass Bed
The choice of filament can greatly impact print success on a glass bed. PLA (Polylactic Acid) is a popular choice due to its ease of use and low printing temperatures. PLA typically adheres well to a glass bed with the right bed temperature, usually around 50-60°C. ABS (Acrylonitrile Butadiene Styrene) requires a higher bed temperature. ABS prints with a glass bed require a bed temperature of approximately 100-110°C. It is crucial to manage the bed temperature. PETG (Polyethylene Terephthalate Glycol) is a versatile material that offers good adhesion and durability. With PETG, you typically won’t need a heated bed. You can use bed adhesion products for enhanced adhesion. You can use glue stick or hairspray. The right filament and optimal bed temperature will ensure that the first layer adheres properly and your prints are successful.
Troubleshooting Common Issues
Even with a glass bed, you might encounter some common issues. Troubleshooting these issues will enable you to improve your printing results. Addressing these issues will enhance your printing experience. Always ensure to follow the recommendations to prevent print failures. If you encounter any issues, take the time to address the issues with the appropriate solutions. Here are some common issues that you might encounter.
Prints Not Sticking
Prints not sticking to the glass bed is a common problem. Ensure that the bed is clean. Residues can reduce adhesion. Ensure that the bed is level. Bed leveling ensures the nozzle is the correct distance from the bed, and that the first layer has good adhesion. Make sure you are using the appropriate bed temperature for the filament. PLA works well at 50-60°C, while ABS requires a higher temperature. Consider using a bed adhesive to further improve adhesion. Hairspray, glue stick, or specialized 3D printing bed adhesives are commonly used. Check that the nozzle is not too far from the bed. A small Z-offset adjustment may be needed. If the first layer is not adhering, increase the Z-offset slightly. By addressing these issues, you will minimize the risk of print failures.
Bed Leveling Problems

Bed leveling issues can result in poor print quality. The bed is not level and the first layer will not stick, or the nozzle might be too close or too far from the bed. Before each print, ensure that the bed is level. Use the paper method to verify. Adjust the bed leveling screws. Perform a test print, such as a single-layer square, to check for consistent adhesion. If the nozzle is too close, it can scrape the bed and cause clogs. If the nozzle is too far, the filament may not adhere. Adjust the Z-offset to fix this. Regularly check and maintain the bed. Over time, leveling screws may come loose. Leveling problems can ruin your prints, so it is vital to address them immediately.
Maintaining Your Tevo Tarantula Glass Bed
Regular maintenance will keep your glass bed in good condition and extend its lifespan. Always allow the bed to cool down before cleaning it. This will prevent thermal stress and potential damage to the glass. Clean the bed after each print. The residue from prints can reduce adhesion. Use isopropyl alcohol (IPA) to clean the bed. You can remove any lingering residues and contaminants. Inspect the glass bed. Check for scratches, chips, or other damage. Minor scratches are typically not a problem. If the bed is damaged, consider replacing it. Replace the glass bed when it is damaged. With proper care and maintenance, you can ensure that your Tevo Tarantula glass bed will serve you well for a long time, providing consistent and high-quality prints.
In conclusion, upgrading your Tevo Tarantula 3D printer with a glass bed is a smart choice that can greatly enhance your 3D printing experience. By following the installation guide and the provided tips, you can improve the quality of your prints. This guide provides all the information you need to get started. Implementing the right settings and maintenance routine will ensure successful and high-quality prints with a glass bed. Enjoy the improvements!