The Tevo Tarantula was a popular entry-level 3D printer, known for its affordability and large build volume. Setting up your Tevo Tarantula and getting your first print can seem daunting, but with a methodical approach, it’s a manageable process. This guide will walk you through unboxing, assembly, calibration, and your first print. Following these steps ensures a smooth start to your 3D printing journey. From unboxing to that satisfying first print, you’ll be creating physical objects in no time. Let’s begin to unlock the potential of your Tevo Tarantula.
Tevo Tarantula Unboxing and Preparation
Before you dive into assembling your Tevo Tarantula, carefully unbox everything. Check the contents against the parts list included in the manual to ensure that all components are present. Take inventory of all screws, nuts, and other small parts. A thorough inventory at the beginning prevents frustrating delays later. Organizing the parts by type makes the assembly process smoother and less stressful. Make sure you have a clear workspace and adequate lighting for efficient assembly.
What’s Included
The Tevo Tarantula typically comes with a frame, various mechanical components (like the X, Y, and Z axes), an extruder, a heated bed, a power supply, a control board, and all the necessary cables. You should also find a set of tools including Allen wrenches, a screwdriver, and sometimes a scraper. The documentation, including the assembly manual, is crucial. Familiarize yourself with the parts list and the diagram before you start. Often, a sample roll of filament will also be included to get you started, allowing you to test your setup immediately.
Tools You’ll Need

While the kit provides some tools, having a few extra tools on hand can greatly improve the assembly process. A good set of Allen wrenches (metric is standard) is essential. A set of small screwdrivers, both flathead and Phillips head, will be needed for securing the various components. A pair of pliers or a small wrench can be helpful for tightening nuts and bolts. A digital caliper is useful for precise measurements and calibration. Having these tools ready will enhance your building experience and allow for better print results.
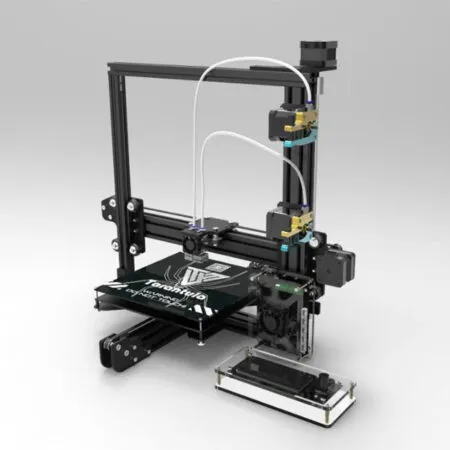
Assembling Your Tevo Tarantula
The assembly of the Tevo Tarantula involves putting together the frame, installing the axes, and wiring the electronics. Follow the manual step by step. Don’t rush. Take your time and double-check each connection. This will help you avoid mistakes. Refer to online videos if you find any step confusing. Many users have created videos to help with the assembly. Proper assembly is key for the printer’s performance. A well-built frame will give you a stable platform and result in more accurate prints.
Building the Frame
Start with the frame. Typically, this involves connecting the vertical and horizontal extrusions. Use the provided screws and connectors to join the frame pieces. Ensure all corners are square. Tighten the screws securely, but avoid over-tightening, which can damage the frame. The frame’s stability is fundamental for the entire printer. A well-constructed frame will allow the print head to move smoothly, and provide a level printing bed. Double-check all connections to avoid any wobbling.
Installing the Z-Axis

The Z-axis controls the vertical movement of the print bed. Carefully attach the Z-axis components to the frame, following the manual’s instructions. Make sure the threaded rods are properly aligned. This step is vital for the Z-axis to move smoothly. The Z-axis needs to be stable and move evenly. Ensure there’s no binding or friction. Proper alignment ensures that the bed moves up and down correctly, allowing for accurate layer deposition during printing. Check all connections to ensure everything is tight.
Attaching the X and Y Axes
The X and Y axes control the horizontal movement of the print head. Assemble these axes according to the manual. Ensure the belts are properly tensioned. Belts should not be too loose or too tight. Make sure the print head carriage moves freely along the X-axis. The Y-axis controls the movement of the heated bed. Double check all connections before proceeding. Ensuring the belts are correctly tensioned and the carriages move smoothly is critical for accurate print quality. Lubricate the rods with a suitable lubricant to ensure smooth motion.
Wiring the Electronics
Carefully connect the stepper motors, endstops, heated bed, and hotend to the control board. Follow the wiring diagrams in the manual. Incorrect wiring can damage the components. Make sure all connections are secure. Use cable ties or other management tools to keep the wires organized. Neat wiring reduces the risk of shorts and allows for easy troubleshooting. Double-check all connections before powering on the printer. Incorrect connections can cause serious issues.
Bed Leveling and Calibration

Bed leveling and calibration are critical for successful printing. The first layer needs to adhere to the bed. Properly level the bed to ensure that the nozzle is the correct distance from the printing surface. Calibration involves adjusting settings to ensure the printer performs as expected. Before you start, clean the print bed surface. This helps improve adhesion. Ensure the nozzle is clear and the hotend is properly heated.
Leveling the Print Bed
Leveling the print bed involves adjusting the bed’s height at multiple points. Most Tevo Tarantula models have leveling screws at each corner of the bed. Use a piece of paper or a feeler gauge to determine the correct nozzle-to-bed distance. Move the print head to each corner and adjust the screws until the nozzle gently grips the paper. Perform this procedure multiple times to ensure consistent leveling across the entire bed. A level bed is crucial for the first layer of your prints. Incorrect leveling can lead to print failures.
Calibrating the Z-Offset
The Z-offset is the distance between the nozzle and the print bed. This distance must be correctly set for optimal first-layer adhesion. The Z-offset can typically be adjusted through the printer’s control panel or in the slicing software. After leveling the bed, heat the nozzle and the bed to their printing temperatures. Then, use the control panel to move the nozzle to the bed. Use a piece of paper to find the optimal distance. Make small adjustments until the nozzle just touches the paper. Save these settings to prevent having to reset them. A properly set Z-offset gives the best chance for your prints to stick.
Loading Filament and First Print

Once the printer is assembled, leveled, and calibrated, you can load the filament and start your first print. Choose a suitable filament, such as PLA. Prepare your model by slicing it using slicing software such as Cura or PrusaSlicer. Make sure you set the print parameters according to the type of filament you are using. Careful planning will ensure the success of your first print. Start with a simple model, like a test cube or a small calibration object.
Filament Selection
PLA (Polylactic Acid) is an excellent choice for beginners. It’s easy to print with, and it has low warping. ABS (Acrylonitrile Butadiene Styrene) offers higher strength and temperature resistance but can be more difficult to print, requiring a heated bed. Other options like PETG are also popular. Research the filament properties before you start. Choose a filament that matches your desired print result. Proper filament selection sets the foundation for good prints. Ensure the filament is dry. Moisture can cause printing problems.
Slicing Your First Model
Slicing software converts your 3D model into instructions for your printer. Select a model from a source like Thingiverse or create your own. Load the model into your slicing software. Configure the settings according to the filament type and your desired print quality. These include layer height, print speed, temperature, and support structures. The settings significantly impact print quality and print time. Experiment with different settings to find what works best. Check the preview to make sure everything looks correct before printing.
Printing Your First Object

Heat the nozzle and the bed to the temperatures recommended for your filament. Load the filament into the extruder. Start the print through the printer’s control panel or from an SD card. Monitor the first layer to ensure it adheres properly to the bed. Make adjustments to the Z-offset if needed. Be patient during the printing process. Once the print is complete, allow the bed to cool. Remove the print carefully. Admire your creation! Have fun with your first print.
Troubleshooting Common Issues
Printing issues can occur, but are often solvable. Understanding the common problems and their solutions is key to improving your prints. When problems occur, be patient and consider what might be the root cause. Consult online forums and other resources. Many users face the same problems. Troubleshooting is a learning process. Learning what to look for and how to solve it improves your printing skills.
Nozzle Clogging
Nozzle clogging is a common problem. This can be caused by incorrect temperatures, dust, or impurities in the filament. You can try to use a needle to clean the nozzle while it is hot. Perform a “cold pull” to remove the filament. Ensure the correct print temperature for your filament. Consider installing a filament filter. Preventative measures like cleaning the nozzle regularly and storing the filament properly can help to avoid this issue. A clogged nozzle disrupts the print. Maintaining the nozzle is critical.
Bed Adhesion Problems

Poor bed adhesion results in prints detaching from the bed. Make sure the bed is level and clean. Use bed adhesion aids like glue stick or painters tape. Adjust the Z-offset to ensure the first layer is properly squished. Ensure the bed temperature is suitable for the filament you are using. Warping is a symptom of poor adhesion. Cleaning the bed can also resolve the problem. Adhesion problems can lead to print failure.
Layer Shifting
Layer shifting occurs when the layers of your print do not align correctly. This is often caused by a loose belt, a skipping stepper motor, or a mechanical issue. Tighten the belts on the X and Y axes. Check the stepper motor drivers to ensure they are functioning correctly. Check for any obstructions preventing smooth movement of the print head. Incorrect motor currents can also contribute to this issue. Layer shifting ruins the print and requires immediate attention. Fixing it will provide better print quality.
Post-Print Tips and Maintenance
After printing, take care to maintain your printer. Proper maintenance extends the lifespan of your printer. Take the time to clean your printer. Routine maintenance keeps your printer running smoothly. This includes removing prints, cleaning the nozzle, and regular check-ups.
Removing Prints

Once the print has cooled, carefully remove it from the print bed. Use a scraper or spatula. Be careful not to damage the bed or the print. If the print is stuck, try gently flexing the bed. If the bed is heated, let it cool completely. Removing prints too early can cause warping or damage. Remove support structures carefully. Practice and experience will improve the quality of the removal.
Cleaning the Nozzle
Clean the nozzle after printing to remove any residual filament. Heat the nozzle and use a brass brush to remove any debris. If the nozzle is clogged, use a needle or a special cleaning tool. Ensure the nozzle is clean before each print. This helps avoid clogging issues. Performing routine cleaning avoids many issues. Keeping it clean ensures the printing process is smooth.
Routine Maintenance
Regular maintenance extends the life of your 3D printer. Lubricate the moving parts. Check the belts for tension. Inspect the frame for loose screws. Keep the printer clean. Performing these steps regularly will improve print quality. Ensure proper storage of your filaments. Store filaments in a dry place. Keep all the tools needed for maintenance in one location. Regular maintenance prevents issues. With proper care, the Tevo Tarantula will serve you well.
Setting up your Tevo Tarantula can seem overwhelming, but following these steps will make the process manageable. From unboxing to your first print, you’ll quickly learn how to create your own 3D objects. Troubleshooting common issues is part of the learning process. With patience and persistence, you will create amazing prints. Enjoy the 3D printing journey!